SUMMONING UBERQUESTS

For a hunter like you, the demons infesting Sanctuary may seem easy to destroy. If you want to test your skill against the mighty beings of ancient times, cast a summoning spell to pull them back from the dead.

As any sorcerer knows, in order to summon a creature you need a Book of Summoning.

Book of Summoning
Book of Summoning
Keep in Inventory to Gain Bonus
Required Level: 7
+1 to Dark Summoning

Create one by cubing three Sacrifical Hearts and three Meditation Candles.

Meditation Candle x3 + Sacrifical Heart x3 → Book of Summoning

The Book grants you a new skill icon. Select the icon and cast the skill in the right area to summon the boss.


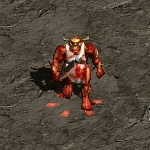
1/11 The Butcher
DIFFICULTY: EASY


Level
Hatred : 60
Terror : 115
Destruction : 120

Summon at
The Hole Level 2 (Act 1: Black Marsh)

Lore
Slain in his hellhole beneath Tristram, the Butcher rises from the dead at the call of your summoning spell and the smell of fresh blood. It is said the Butcher cannot be summoned without an acceptable human sacrifice, and if none is provided, he will take one...

Strategy
The Butcher is the ultimate melee fighter. His tainted cleaver hits hard and if he catches you, you are dead meat. His flabs of fat negate a large percentage of your attacks, which would be a problem if he wasn't invulnerable to mortal weapons and spells in the first place. Like a Hellcat playing with a mouse, the Butcher may reveal his one weakness if you can take enough pain to convince him you are no threat... let him hit you and there is a chance (20% on attack) a glowing bright red pentragram will appear. Lure him on it to kill him.

Reward
Defeat the Butcher on Destruction difficulty to get The Butcher's Tooth.

The Butcher's Tooth
The Butcher's Tooth
Keep in Inventory to Gain Bonus
Required Level: 40
50% Chance of Open Wounds
+10 to all Attributes
100% Extra Gold from Monsters
40% Better Chance of Getting Magic Items

The Black Road Challenge
Defeat The Butcher on Terror difficulty to be able to do a part of this challenge.

See THIS PAGE for more information about the Black Road Challenge.


2/11 The Binding of Baal
DIFFICULTY: MODERATE


Level
Hatred : 65
Terror : 115
Destruction : 120

Summon at
Act 2: Valley of Snakes

Lore
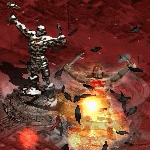
Reenact the capture and imprisonment of Baal by Tal Rasha and his Horadrim, with you playing the role of Baal. To protect their leader, the Horadrim weave warding spells that make Tal Rasha immortal until the last of his soldiers has died and their spirits have faded.

Strategy
During this uberquest, you morph into Baal when you are near Tal Rasha. The archmage himself is immune to all damage until you get rid of all Horadric Mages. Even then, Tal Rasha has a phasing spell that negates a percentage of incoming attacks and their elemental affinity grants all mages 50% resistance to all. Being magical in nature, the shield aura is vulnerable to resistance breaking spells, offering the hero another way to deal with Tal Rasha. Beware the Horadrim's fire and lightning spells, empowered with ancient metamagic to bypass up to 250% of your resistances.

Reward
Defeat Tal Rasha on Destruction difficulty to get the Scroll of Kings.

Scroll of Kings
Scroll of Kings
Keep in Inventory to Gain Bonus
Required Level: 60
+(16 to 20)% to Spell Damage
(16 to 20)% Bonus to all Attributes

Level Challenge 2
Defeat Tal Rasha on Terror difficulty, while your character is under level 90, to be able to do this challenge.

See THIS PAGE for more information about Level Challenge 2.

NOTE: Summon on open space.


3/11 Assault on Mount Arreat
DIFFICULTY: MODERATE


Level
Hatred : 70
Terror : 115
Destruction : 120

Summon at
Act 5: Arreat Summit

Lore
In ages past, Diablo himself attempted to invade Mount Arreat to destroy the Worldstone and was repelled by the Bear tribe defenders and their king, the shaman Koth. This is a reenaction of that battle on the peak of Mount Arreat, with you as Diablo.

Strategy
The powers of the Bear Shamans protect King Koth with an ancient invulnerability shield until the last of the defenders has fallen. Even when the shield is down, the King's spirits deflect a percentage of incoming attacks. Thanks to their connection to the primal forces, all shamans have an innate 50% resistance to all. In many aspects this is the physical version of the Tal Rasha fight.

Reward
Defeat King Koth on Destruction difficulty to get the Sacred Worldstone Key.

Sacred Worldstone Key
Keep in Inventory to Gain Bonus
Required Level: 80
Enhanced Weapon Damage +(41 to 50)%
Total Character Defense Plus (21 to 30)%

The Black Road Challenge
Defeat King Koth on Terror difficulty to be able to do a part of this challenge.

See THIS PAGE for more information about the Black Road Challenge.


4/11 Akarat
DIFFICULTY: TRICKY


Level
Hatred : 75
Terror : 115
Destruction : 120

Summon at
Act 3: Kurast Causeway

Lore
The church of Zakarum is highly ritualistic. One of the grand Zakarumite ceremonies involves the summoning and ritual crucifixion of the living spirit of the prophet Akarat by the church fathers of Travincal, four times a year or in times of trouble. These are certainly troubled times, but there is no telling if the ritual may be affected by the corruption that has tainted the temple city...

Strategy
The corrupted spirit of Akarat is protected by heavenly invulnerability and is impossible to attack directly. Remember that a religion is nothing without followers and attack his twelve apostles first. The death of one of his apostles unleashes a wave of holy energy, reducing all resistances of other apostles to -100% and breaking the immunity shield of Akarat himself, reducing all resistances to 0% for a few precious seconds. This does however enrage them and they will attack you with renewed vigour. Killing an apostle may be difficult due to the mass healing spell they cast when low on health, as well as the storm of magical hammers with which they pummel you from a distance and their ability to heal when they slay a minion or hero. If you have access to Nightmare or a Void Archon, use it to shut down their healing. Akarat himself is blessed in another way as well: the spirits of the Light repel a percentage of all incoming attacks.

Reward
Defeat Akarat on Destruction difficulty to get the Visions of Akarat.

Visions of Akarat
Visions of Akarat
Keep in Inventory to Gain Bonus
Required Level: 100
+(201 to 250) Defense
+(21 to 25) to all Attributes

2% chance to drop a trophy on Destruction difficulty. Cube the trophy with the charm for a small bonus.

Akarat Trophy
Akarat Trophy
Cube with the Visions of Akarat...
Increase Maximum Life and Mana 5%

5/11 Legacy of Blood
DIFFICULTY: TRICKY


Level
Hatred : 85
Terror : 115
Destruction : 120

Summon at
Tower Cellar (Act 1: Black Marsh)

Lore
Bartuc, the Warlord of Blood, was once Horazon's brother in the Vizjerei mage clan. Whereas Horazon wanted to summon demons to enslave them, Bartuc chose to worship them and traded his soul for demonic power. Their conflict eventually led to a civil war that shattered the mage clan. Although Bartuc was eventually destroyed by the very powers he sought to control, his soul and power have been claimed by the forces of Hell. It may be possible to summon Bartuc's spirit in the crypt where his cursed armour was buried...

Strategy
Bartuc and his summoned Blood Golems have ranged attacks and can hurt a lot in this tiny room. Protected by the power of his cursed armour, Bartuc and his golems are invulnerable to damage. However, his Wychwind blade throw requires him to concentrate on the spell and drop his resistances for a brief time, and his dimwitted golems may briefly forget to shield themselves when they successfully hit you and are distracted by your suffering.

Reward
Defeat Bartuc on Destruction difficulty to get the Legacy of Blood.

Legacy of Blood
Legacy of Blood
Keep in Inventory to Gain Bonus
Required Level: 100
(2 to 4)% Life Stolen per Hit
(2 to 4)% Mana Stolen per Hit
Maximum Skill Level Increased by 2

2% chance to drop a trophy on Destruction difficulty. Cube the trophy with the charm for a small bonus.

Legacy of Blood Trophy
Cube with the Legacy of Blood...
Total Character Defense Plus 15%

6/11 Lord Aldric Jitan
DIFFICULTY: HARD


Level
Hatred : 80
Terror : 115
Destruction : 120

Summon at
Nihlathak's Temple (Act 4: Harrogath)

Lore
Driven mad by nightmares, the Western aristocrat Lord Aldric Jitan hopes to summon a terrible demon and plunge the land into darkness. Stop him before he does.

Strategy
Lord Aldric Jitan linked his lifeforce to his Royal Guards, granting him unholy immortality until all of his guardsmen are dead. The demonic powers guiding his actions also imbue him and his guardsmen with 50% all resistances and the ability to harmlessly deflect a percentage of incoming attacks. The guardsmen are tougher than anything that came before and will heal themselves, inflict tri-elemental damage and summon guard towers that will pummel the living daylights out of you if you stand still for too long. Keep moving and the towers will vanish behind you. When any of the enemies dies, the dark forces reclaim his spirit, creating a vortex of magic that should be given wide berth.

Reward
Defeat Lord Aldric Jitan on Destruction difficulty to get the Moon of the Spider (1/6 chance).

Moon of the Spider
Moon of the Spider
Keep in Inventory to Gain Bonus
Required Level: 100
+(21 to 25) Energy Factor to Spell Damage
Maximum Skill Level Increased by 1
+1 to Jitan’s Gate
Half Freeze Duration

2% chance to drop a trophy on Destruction difficulty. Cube the trophy with the charm for a small bonus.

Lord Aldric Jitan Trophy
Cube with the Moon of the Spider...
Enhanced Weapon Damage +25%

7/11 Judgment Day
DIFFICULTY: VERY HARD


Level
Hatred : 90
Terror : 115
Destruction : 120

Summon at
Act 1: Inner Cloister

Lore
When Uldyssian sacrificed his life at the Cathedral of Vanity in the battle between angels and demons, his soul was thought to be blown to the far reaches of the universe. But a malicious spirit in the High Heavens, watching over the battle from afar, snatched Uldyssian and his edyrem on their way to oblivion. Imperius, archangel and high warlord of the Crystal Arch, had his own opinions about Sanctuary and the human vermin inhabiting it. This taint on creation had to be eradicated. But his side of the argument, despite the support of Malthael, lost out in the Angiris Council due to the intervention of Tyrael, and the ensuing blood pact with Mephisto prevented him from intervening on the mortal plane at all. A puppet had to be found, and Uldyssian was just what he sought. After a thorough brainwashing, Imperius sent his harbinger Dark Uldyssian to Sanctuary with the mission to exact divine justice and destroy the world...

Strategy
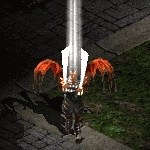
Dark Uldyssian and his Fallen Edyrem exist only partially on the mortal plane and cannot be hit by mortals. When Dark Uldyssian hits a player or minion, an avatar of Imperius or Malthael may be summoned (1% chance) to interfere directly with the battle and this avatar is vulnerable to attack. The Fallen Edyrem do not have this power, but you can tell apart Dark Uldyssian by his heavy armour. Both Avatars can throw alchemical holy hand grenades packing the power of creation itself, summon homing magical bolts and summon more Fallen Edyrem at a rapid rate.

Reward
Defeat Imperius or Malthael on Destruction difficulty to get the Crystalline Flame Medallion.

Crystalline Flame Medallion
Keep in Inventory to Gain Bonus
Required Level: 120
+1 to Summon Edyrem
Fire Absorb 10%
Cold Absorb 10%
Lightning Absorb 10%

2% chance to drop a trophy on Destruction difficulty. Cube the trophy with the charm for a small bonus.

Judgement Day Trophy
Cube with the Crystalline Flame Medallion...
5% Bonus to All Attributes

Bonus quest
If you are exceptionally daring or suicidal, distract Dark Uldyssian until both the Avatar of Imperius and the Avatar of Malthael are summoned. Destroy them both within 30 seconds, then transmute the Medallion in the cube to upgrade it. Make sure you kill both Avatars, not the same one twice or the recipe will not work.

Crystalline Flame Medallion → Crystalline Flame Medallion with added bonuses

This upgrade recipe adds the following bonuses:

100% Chance to cast level 62 Apocalypse when you Die
+3 to All Skills
+50 to All Attributes


8/11 Zorun Tzin
DIFFICULTY: VERY HARD


Level
Hatred : 85
Terror : 115
Destruction : 120

Summon at
Hidden Fortress - Sewers Level 2 (Act 3: Kurast Bazaar & Upper Kurast)

Once you enter, you cannot go back trough the stairs.

Lore
Zorun Tzin is a powerful mage from Khejan that was sent to discover more about the Edyrem and their powers. He was jealous of them for having these immense powers from birth, as opposed to him having to study a lifetime to acquire them. He wanted to get hold of Uldyssian, the Edyrem leader, so he ambushed a caravan Uldyssian traveled with, capturing him. Before he could thoroughly interrogate him, his servant, the giant Terul, who was possesed by Malic, tried to possess Uldyissian. Uldyssian defeated Malic, but before dying, he possessed Zorun Tzin, thus killing him.

See THIS PAGE for more information about Terul.

Strategy
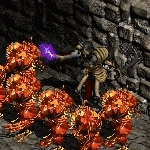
He has a Heroic Shield, but it will not be so easy to drop it. Every 10 seconds he will summon a statue, that will render him and all nearby monsters immune to all incoming damage.

The statues are fairly easy to take down, but for that, your spells or weapon attacks won't work. What you have to do is simply purify them. When you purify one to destruction, Zorun Tzin will become vulnerable. After 10 seconds, he'll summon another one. The statues have 25% avoid, so every 4 purifies, one will miss. However, purifying these statues might be a bit harder than this. They spawn with big Yetis that are so big that you might need to lure them a bit before you can purify the statue.

Yetis themselves are no big threat. They have decent life, not very strong attack, and their only purpose is being meatshields.

Reward
Defeat Zorun Tzin on Destruction difficulty to get the Unknown Skull 2.

The Unknown Skull 2 can be used for a few powerful recipes.

See THIS PAGE for more information about the first recipe.
See THIS PAGE for more information about the second recipe.

Drop Bias
Zorun Tzin has an increased chance to drop many Unique items.


9/11 Brother Laz
DIFFICULTY: IMPOSSIBLE


Level
Hatred : 95
Terror : 115
Destruction : 120

Summon at
Swampy Pit Level 3 (Act 3: Flayer Jungle)

Once you enter, you cannot go back trough the stairs.

Lore
There are many religions in Sanctuary. Although they all tell very different stories, loremasters agree that since most of them seem to be effective and enable their faithful to work miracles, there has to be a common truth between them. One particular element found in most religions is the creation of the world by a God or other deity, whether it be Anu, the Earthfather and Skymother or even Tiarna Dulra. Some even believe that the world as we know it was shaped by an individual human on another plane, one 'Brother Laz' with a calculation engine powered by lightning. According to this cult, when humanity complains too much about the difficult living conditions in Sanctuary and the scarcity of divine weaponry, he may send his avatar to the mortal plane to deal with those who annoy him in person...

Strategy
The Groupies are just your average frenzied fanbois with throwing knives and should not be too hard to dispatch despite their tri-elemental attack. The boss, Brother Laz, is at a whole different level. Do not stand still in his crosshairs or he will cast either Deathstrike or Singularity on you and annihilate you. If you keep moving, he will attempt an offensive teleport, summon more minions and may cast totems that kill you if you go near them. Do not destroy the totems: they will unleash wild magic that renders you brittle as glass and heals Brother Laz and his Groupies. Using his leet hax0r powers, Brother Laz is invulnerable to any damage and this time there is no loophole or weakness. Use the Purify skill you acquired in Duncraig and keep hitting the power tripping modmaker with it until he dies.

Reward
Defeat Brother Laz on Destruction difficulty to get the Glorious Book of Median.

Glorious Book of Median
Keep in Inventory to Gain Bonus
Required Level: 100
+1 to All Skills
(51 to 75)% Damage to Demons
+50 Damage
All Resists +(11 to 15)%
(0 to 5)% Reanimate as: Groupie
(201 to 250)% Extra Gold from Monsters

2% chance to drop a trophy on Destruction difficulty. Cube the trophy with the charm for a small bonus.

Brother Laz Trophy
Brother Laz Trophy
Cube with the Glorious Book of Median...
+1 to All Skills

To invest further power into the Glorious Book of Median, and to try to attain the wisdom and power of Brother Laz and MarcoNecroX, you can use these expensive and powerful recipes to first create the Book of Ultimative and then add it to the Glorious Book of Median.

Book of the Wise + Tokens of Pain, Suffering, Hatred, Terror, Destruction & Lies → Book of Ultimative
Glorious Book of Median + Book of Ultimative → Glorious Book of Median with added bonuses

This upgrade recipe adds the following bonuses:

+2 to All Skills
Maximum Skill Level Increased by 1
+25 to All Attributes

Congratulations!

See THIS PAGE for more information about the Book of the Wise and the 6 Tokens.


10/11 MarcoNecroX
DIFFICULTY: IMPOSSIBLE


Level
Hatred : 95
Terror : 115
Destruction : 120

Summon at
Act 5: The Worldstone Chamber

Lore
MarcoNecroX, as the right hand of Brother Laz, and the Prime God of his cult after his disappearance, possesses the Ultimate power of creation and destruction on all known planes. He keeps watch over the Worldstone in secret, ready to appear in a mortal form to strike down anyone who opposes his will.

Strategy
Not much is known except that he is very powerful indeed...

Reward
Defeat MarcoNecroX on Destruction difficulty to get the Soulkeeper.

Soulkeeper
Soulkeeper
Keep in Inventory to Gain Bonus
Required Level: 120
Thunderfury*
Adds Strength Damage Bonus: (25/256 per Strength)%
Increase Maximum Life and Mana (6 to 10)%
-5 to Light Radius

* This Thunderfury can trigger separately from the one on other items.


11/11 Secret: Inarius’ Revenge
DIFFICULTY: UNKNOWN


Level
Hatred : ???
Terror : ???
Destruction : ???

Summon at
Unknown

Lore
In his vanity, fallen angel Inarius made the fatal mistake of raiding one of Mephisto's black temples on mortal soil and killing the dark monks there. The Prime Evils had previously ignored this rebellious angel, but this was an insult they could not leave unpunished. Mephisto invaded Inarius' cathedral of vanity, burned it to the ground and captured Inarius and his followers, warping and mutating them into flabby and horrible creatures - the Overlords - instilling them with eternal hatred for the still beautiful creations of Zakarum, humans. You may be able to summon Inarius' ghost at a place of great significance for the fallen angel...

Strategy
Unknown

Reward
Defeat Inarius' ghost on Destruction difficulty to get the Spirit of Damnation.

Spirit of Damnation
Spirit of Damnation
Keep in Inventory to Gain Bonus
Required Level: 120
Cube with your Idol of Vanity

Cube this charm with your Idol of Vanity to unleash the full power of the Spirit of Damnation onto it.

Idol of Vanity + Spirit of Damnation → Idol of Vanity with added bonuses

This upgrade recipe adds the following bonuses:

Already upgraded!
1% Chance to cast level 20 Death Spiral when Struck

See THIS PAGE for more information about the Idol of Vanity.